














































































Most resin coffee table failures are decided before anyone opens a tin. The wrong epoxy, a damp slab of walnut, or a bench that sits slightly off level can show up weeks later as a milky cloud or a crack running through the river. If you want to make resin art that holds up to hot mugs and Sunday newspapers, most of the work is preparation. The pour itself is the short, nervous part.
At Giant Sculptures, most of our days go to bronze, stainless steel and stone. Our resin art pieces get the same discipline: test the material, respect the cure, and know when a job belongs in a studio. Below, that thinking is applied to a resin art coffee table, along with where to put a finished resin coffee table once it's out of the mold.

Quick Answer: How to Make Resin Art for a Coffee Table
Choose two resins. Use deep-pour casting epoxy for the river or body of the table, and keep thin coating epoxy for the final flood coat.
Dry the timber. Aim for about 6 to 8 percent moisture, and never pour over wood above 12 percent.
Build a mold that releases. Use melamine board, seal every tape seam, and level the bench in both directions.
Pour in layers. Keep each layer within the manufacturer's maximum depth so the resin doesn't overheat.
Wait a week. Let the slab cure for roughly seven days before sanding hard or putting your resin coffee table into daily use.
Coating Epoxy or Deep-Pour? Choose Before You Mix
Coating, or tabletop, epoxy is thick and quick to cure. It is made for layers around 1/8 inch (3 mm) deep. Pour it 2 inches (5 cm) into the river channel of a resin coffee table and it traps its own heat, clouds over, and often cracks. Deep-pour casting resin is thinner and slower. It is designed to release heat over days rather than hours, which gives bubbles time to rise out before the resin gels.
Most resin coffee tables need both. Casting resin forms the body of the table, and coating resin goes on top if you want a high-gloss finish. People who make resin art in small trays often skip this step, then wonder why a scaled-up pour behaves so differently. Read the technical data sheet for maximum pour depth and working temperature, which is usually around 70 to 75°F (21 to 24°C). Treat those numbers as rules.
Wet Timber Ruins Good Resin
Wood keeps moving after it is cut. If you pour epoxy against a slab that is still wet inside, the trapped moisture and air push outward as the resin warms. The result is a stream of bubbles along the live edge of the resin coffee table and, months later, a bond that lifts or separates. The USDA Forest Products Laboratory's Wood Handbook explains how timber swells and shrinks as its moisture content changes. Sealing or wrapping the surface slows that movement but does not stop it.
To make resin art over wood, buy kiln-dried slabs and meter them in several spots. Then brush or scrape on a thin seal coat of epoxy and let it tack before the main pour, which closes the pores that would otherwise release air. Skip this and the failure is a familiar one: a walnut resin coffee table looks perfect for a month, then, as summer humidity shifts, a silvery line of bubbles appears along both edges. The usual culprit is a slab that was air-dried rather than kiln-dried, and no resin, however good, can fix that.

A Mold That Releases Starts with Melamine
Epoxy sticks to almost everything, which is the point and also the problem. Melamine-faced board is the standard mold material because cured resin pulls away from it cleanly, especially with sheathing tape or a purpose-made release agent. Tape every seam, then run a bead of silicone caulk into the inside corners. A slow leak at 2 a.m. will drain the river and glue your resin coffee table to the bench.
Level the mold along its length and its width with a long spirit level. Across a 6-foot (1.8 m) resin coffee table, a slope too small to see becomes a clear difference in thickness from one end to the other. Floors settle and benches shift, so a mold that was level yesterday can still produce a slab a few millimeters thinner at one end. Recheck level right before every pour.
Plan the Layers Before the First Pour
Epoxy cures through a heat-producing reaction. The more resin in one mass, the hotter it gets, and the heat speeds the reaction up further. A single thick pour can run hot enough to crack, warp, and yellow from the inside. Before you make resin art at this depth, plan the schedule on paper: total depth, maximum depth per layer, volume per layer, and how long to wait between layers. That planning also gives a resin coffee table its sense of depth, because pigments, mica, or suspended pieces can go into specific layers. Measure the resin exactly, scrape the sides of the bucket while mixing, and pass a heat gun lightly over each layer to pop surface bubbles.
Why a Week of Curing Matters More Than the First Day
Most resins feel hard within a day or two, and that is the moment many people who make resin art unclamp the mold and set a mug down on their new resin coffee table. Wait. The resin is still curing and will take dents, cup rings, and clamp marks it would shrug off a week later. Keep the room near 70°F (21°C), away from drafts and dust, and leave the slab alone for around seven days, or longer if the data sheet says so. When it's ready, demold slowly with gentle wedges rather than force.
Sanding to Glass, and When to Hand It to a Studio
Flatten the slab with a router sled if it needs it. Then sand up through the grits, typically from around 80 to 400, and wet-sand up to 2000 or 3000 before polishing. Skipped grits leave swirl marks on a resin coffee table that you won't see in the garage and will see under a pendant light. Finish with polishing compound or a final flood coat of coating epoxy.
This is where many attempts to make resin art at home stall. The slab has warped, a cloud has formed in the third layer, or the resin coffee table is simply too heavy to flip safely. Handing it to a fabrication studio for flattening, repair, or a fresh flood coat often costs less than starting over with new timber. And if what you really want is the look of layered, glowing resin rather than a long weekend project, a finished backlit wall piece such as Genesis Jade 3D Resin Crystal Porcelain LED Wall Art gives you that depth on a surface where nobody will ever put down a hot mug.
Where to Place a Resin Art Coffee Table
For wider placement ideas, Coffee Table Resin Art: What Survives the Hot Mug Test is useful companion reading before finalizing the setting and sightlines.
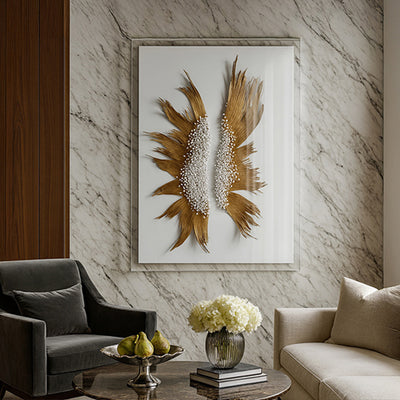
Keep resin out of direct sun. UV light yellows most epoxies over time, so a resin coffee table against a west-facing window in a Scottsdale living room will age faster than one in a shaded Brooklyn den. UV-stabilized formulas slow the yellowing but don't stop it. Keep the table away from fireplaces and heating vents, use coasters, and let the wall carry the palette. With a warm walnut-and-amber slab, a backlit panel in the same family of tones, like Genesis Earth Tones, picks up the amber without competing with the grain.
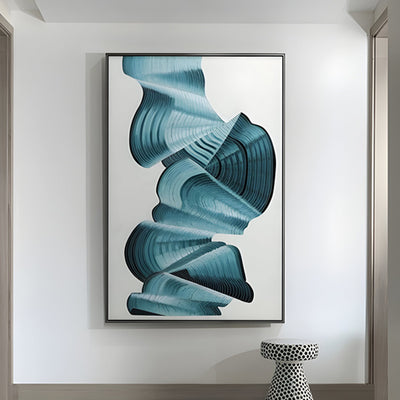
Blue river resin coffee tables call for something cooler and smaller. At 40cm, a compact relief such as Ocean Blue Resin Splash & Character Wall Relief echoes the color without fighting the table for attention. For larger rooms, our wall sculptures add scale above a long sofa.

Before You Pour: A Practical Checklist
Casting and coating epoxies bought, with data sheets read for depth and temperature
Timber metered at 6 to 8 percent in several places
Seal coat applied and tacky
Melamine mold taped, caulked, and leak-tested with water
Bench leveled in both directions on pour day
Layer schedule written down, with volumes calculated
Room held near 70°F (21°C) for the full cure week
A plan for flattening, sanding, and moving a heavy slab
Learning to make resin art at the scale of a resin coffee table teaches patience faster than almost any other craft. If your project calls for a statement piece rather than a weekend experiment, Giant Sculptures can discuss bespoke resin or mixed-material commissions. Budget depends on scale, materials, complexity, finishing, and installation, so ask us for a tailored quote.