












































Almost anyone can make clear resin sculpture that looks flawless on day one. The hard part is year three, when the piece has sat in a sunny room in Scottsdale and the crisp water-clear block has drifted toward the color of weak tea. Clarity is not a single decision at the pour. It is a chain of decisions, and every weak link shows up as haze, amber cast, bubble trails or a milky core that no amount of polishing will fix.
Our studio casts clear resin alongside bronze, stainless steel and stone, and the resin work is by far the least forgiving of shortcuts. Metal hides small sins under patina. Transparent resin publishes them. That is the real test when you make clear resin sculpture: not the pour itself, but the years that follow it.

Key Takeaways Before You Pour
Chemistry first: UV-stabilized epoxy holds clarity far longer than general-purpose polyester casting resin.
Heat is the enemy of depth: thick pours cook themselves and fog from the inside out.
Moisture ruins batches silently: damp molds, humid air and cold pigment all cloud a cast.
Bubbles are removed before the pour, not stirred out during it.
Finishing is 400 to 3000 grit and then polish, and this is where most self-taught casters stop too soon.
Scale changes everything: past roughly knee height, a clear cast becomes an engineering job, not a weekend project.
How to Make Clear Resin Sculpture: The Four Ways Transparency Dies
Moisture is first. Water trapped in a mold surface, in a filler, or condensing out of humid workshop air will emulsify into the resin and read as a faint milkiness you only notice once the piece is lit from behind. Heat spike is second: an over-catalyzed or over-thick pour runs away with itself and clouds the middle. Dust is third, and it is brutal, because a single settling layer of workshop dust on a curing surface creates a permanent internal plane. Impatience is fourth and the most common. Demolding early, sanding warm resin, or rushing the polish leaves swirl marks that scatter light exactly where you wanted it to pass through.
Control the room before you control the chemistry. Warm, dry, still air. A closed cure box. Nothing overhead that sheds fibers.

Epoxy Versus Polyester: Which One Is Still Clear in Year Three
If you want to make clear resin sculpture that survives a decade of daylight, chemistry is the first fork in the road. Polyester casting resin is cheaper to buy, cures fast, sands hard and smells like a boatyard. It also shrinks more, cracks more readily in thick sections, and tends toward a yellow shift under UV. Epoxy with a genuine UV inhibitor package is slower, more sensitive to mix ratio, and much more likely to still look like glass after several years indoors.
No transparent polymer is truly permanent. Conservators dealing with plastics in museum collections have documented how varied and unpredictable synthetic materials age compared with bronze or stone, which is why institutional conservation teams treat plastics as an active monitoring category. If a client wants a piece that will read the same in fifty years, we steer the conversation toward metal or stone and reserve resin for the optical effects nothing else can achieve.
Deep Pours Make Their Own Heat
Epoxy cures exothermically. Double the pour depth and you do not double the heat, you compound it, because the mass insulates itself. That is why a 2 inch (50 mm) test block cures beautifully and a 6 inch (150 mm) block from the same batch comes out with a hazy, sometimes cracked core.
Staged layers are how we make clear resin sculpture at depth without cooking the middle of the block.
Two fixes. Use a resin system formulated specifically for deep casting, which is chemically slowed to spread the heat over a longer window. And pour in layers, letting each one reach a firm gel before the next goes on. Layer lines show if you time it badly, so test on an offcut before committing to the real piece. Once a form reaches floor-standing height, as with the Clear Resin Triangle with Rocks Sculpture at 130cm (about 51 inches), the transparent mass has to be staged and engineered rather than poured in one go.
Mold Gloss Decides Surface Clarity
Whatever texture the mold has, the casting copies with perfect obedience. A satin silicone mold gives you a satin casting, and you will then spend hours sanding back to clarity. Cast against polished acrylic sheet, glass, or a high-gloss tooling surface and the piece emerges close to finished. Anyone who has tried to make clear resin sculpture from a dull tool knows exactly what that sanding penalty costs in hours.
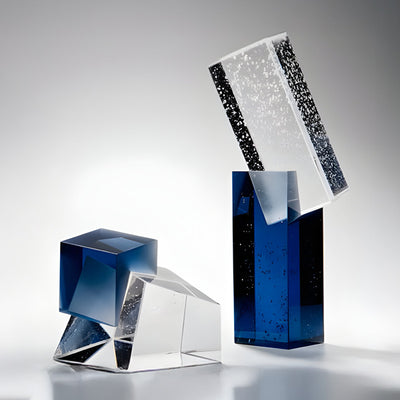
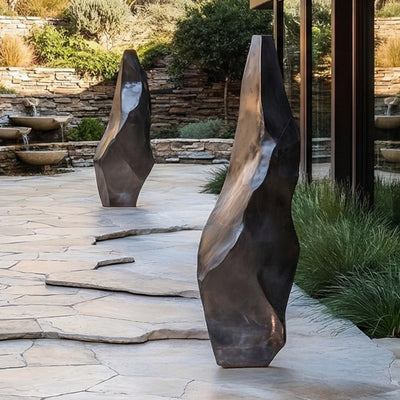
On small, flat-faced geometric work, mold quality does more for the final look than any polishing compound you can buy. The facets on a shelf-scale object like the 27cm Clear Resin Inlay Black Angular Rock Sculpture - 27cm (roughly 11 inches) come off a gloss tool rather than out of a long sanding sequence, which is why the edges stay crisp instead of softening.

Why Bubbles Are a Degassing Problem
Stirring faster does not remove bubbles. It makes them. Air is entrained during mixing, and the only reliable ways to get it out are a vacuum chamber before the pour, a pressure pot during the cure, or both. Slow folding with a flat blade rather than a whisk keeps entrainment down in the first place. Warming the resin slightly lowers viscosity so trapped air can rise. A brief pass with a heat gun pops surface bubbles but does nothing for the ones sitting an inch down.
For any inclusion work, seal the inclusion first. Porous stone, wood or dried botanicals hold air and release it slowly, and those bubbles will surface hours after you have walked away. Degassing equipment is not optional gear for anyone trying to make clear resin sculpture with real depth to it.
Grits 400 to 3000, Then Polish
Wet sand progressively: 400, 600, 800, 1000, 1500, 2000, 3000. Skip a grit and the previous scratch pattern survives under the next one, invisible until the polish stage reveals it as a dull band. Keep water flowing, keep the paper flat on a block, and change direction 90 degrees between grits so you can see when the last set of scratches is gone.
Wet sanding through the full grit sequence, then a low-speed polish, is where optical clarity is actually won.
Then machine polish with a plastic-specific compound at low speed. Heat from an aggressive pad will burn the surface and cloud it again. This is the stage that separates a hobby cast from something that belongs in a Napa dining room. Across our resin sculptures collection, the surfaces almost always took longer to finish than to cast.
When a Piece Is Too Big for a Home Workshop
Weight arrives faster than people expect. Clear resin is dense, and a large solid form quickly moves past what one person can lift, let alone demold safely. Structural loads, internal armatures, base fixing and shipping crates all become real problems, and the point where you can no longer make clear resin sculpture on your own bench arrives sooner than most people plan for. We once had a client in Texas ask us to scale up a tabletop clear form to lobby height; the honest answer was that the geometry had to be redesigned, not enlarged, so the clear sections stayed within safe pour depths.
Redesigning usually means breaking the transparency up rather than growing it. At 141cm (about 55 inches), the Clear Resin Cube & Dual Black Rock Sculpture - 141cm works precisely because the clear mass is proportioned against solid dark elements that carry both the visual weight and the structure, keeping each poured section within a depth that can cure cleanly. If you want that effect at scale, a bespoke commission with Giant Sculptures removes the guesswork on mass, mounting and finish. Cost depends on scale, resin system, mold tooling, finishing hours and installation, so we quote each piece individually.

Pre-Pour Checklist
Workshop warm, dry and dust-controlled, with a cure box ready
Resin and hardener at working temperature, mix ratio measured by weight
Mold gloss checked, released and fully dry
Inclusions sealed and pre-wetted
Vacuum or pressure equipment set up before mixing starts
Pour depth within the manufacturer's stated limit, layers planned
Full grit sequence and polishing compound on hand before you demold
Final display spot assessed for direct sun and heat
Get those right and clarity stops being luck. If the piece you have in mind is larger, heavier or more valuable than your bench can handle, talk to us about a commission instead; you can also compare optical effects across our acrylic sculptures and abstract sculptures before deciding which material suits the space.
For wider placement ideas, Abstract Geometric Art: A Buyer's Guide to Angular Sculpture With Presence is useful companion reading before finalising the setting and sightlines.