


If you’ve ever tried painting with acrylics on canvas and ended up with streaks, chalky patches, or colours that look “not quite right”, you’re not alone. Acrylic art can look effortless online, but the finish usually comes down to a few simple basics done in the right order. Acrylic paint is beginner-friendly, yet it has its own rules, especially because it dries quickly and layers differently from other paints. Once you understand how acrylic behaves, your results become far more consistent.
This guide gives you a practical, start-to-finish method for acrylic painting on canvas, with clear steps you can follow each time. Designed to support acrylic arts at every level, it shows you how to prep the surface properly, choose the right tools, and lay down smoother first layers. Then we’ll build depth through layering, improve colour mixing, and refine edges so the painting reads cleanly and confidently. Finally, you’ll finish and protect the piece so it looks intentional, polished, and ready to display.

What Makes Acrylic Arts Work So Well On Canvas?
Canvas has a gentle tooth (that subtle texture you can feel with your fingertips), and that tooth is brilliant for holding acrylic paint in place. It helps your first layers grip, and it gives later layers something to sit on top of especially useful when you’re learning how to build depth without smearing everything.
Another reason acrylic arts work so well on canvas is flexibility. You can paint thin and smooth for clean gradients, or apply thick paint for bold, textured strokes. Because acrylic dries quickly, you can also correct mistakes without waiting all day. Paint a wonky edge? Let it dry, repaint it. Overdid a highlight? Let it dry, glaze over it. That quick reset is one of the biggest reasons acrylic is so enjoyable.
The key is to work in the right order: prep → plan → block in → layer → refine → finish. Once you stick to that sequence, your painting will feel calmer, cleaner, and far easier to control.

What You Need (Simple Supplies That Actually Help)
You don’t need a studio full of kit to get strong results in acrylic arts. A small, reliable set of tools is better than a big pile of random bits you don’t understand yet.
Canvas: pre-primed canvas or canvas board (great for practice and studies)
Acrylic paint: a small starter set plus a bigger tube of titanium white
Brushes: synthetic flat, filbert, and round (one medium, one smaller for detail)
Palette: any wipe-clean surface, a ceramic plate, or palette paper
Water jar + cloth/paper towel: for quick rinsing and wiping
Pencil + eraser: for a light sketch that won’t show through
Optional but useful: palette knife, fine mist spray bottle, masking tape for clean edges
A quick note on paint: cheaper acrylics can be perfectly fine for practice, but they may need extra layers to look solid. If you notice weak coverage, it’s not you sometimes it’s the paint. Use a couple of thin coats and you’ll still get a clean result.

Step 1: Prep The Canvas (This Stops The Streaky Look)
Even “pre-primed” canvases can feel thirsty, and that dryness can pull paint unevenly, which creates those annoying streaks. A quick prep makes a noticeable difference in acrylic arts, especially if you like smooth backgrounds or solid blocks of colour.
Check the surface: run your hand across the canvas. If it feels rough, dry, or overly textured, prep will help.
Apply gesso (optional but recommended): use a wide flat brush and add one thin, even layer. Don’t overload the brush thin and smooth beats thick and gloopy.
Let it dry fully. If you want a smoother surface (great for portraits, crisp lines, or neat gradients), do a light sand with fine sandpaper, then wipe away dust.
Repeat if needed: one coat is often enough, but two thin coats can make a canvas feel much more pleasant to paint on.
Why this matters: paint sits more evenly, colours stay brighter, and you’ll use less paint overall. You also avoid “patchy” coverage that can make a beginner painting look unfinished.

Step 2: Pick a Simple Composition (Don’t Wing It On The Canvas)
Acrylic rewards quick decisions. If you start painting without a plan, you’ll spend most of your time fixing problems that didn’t need to happen. In acrylic arts, a simple composition gives you structure, which keeps the painting from turning into a jumble.
Choose one of these beginner-friendly options:
Single subject: one vase, a mug, a piece of fruit, or a simple leaf
Rule of thirds: place your main focal point slightly off-centre
Big abstract shapes: brilliant practice for colour, edges, and balance
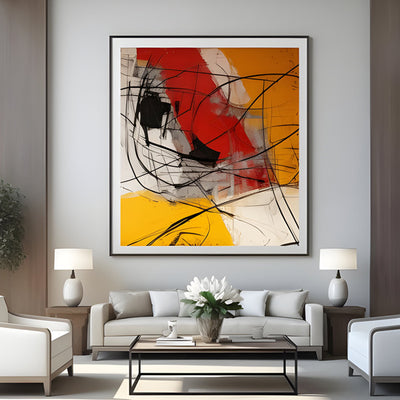
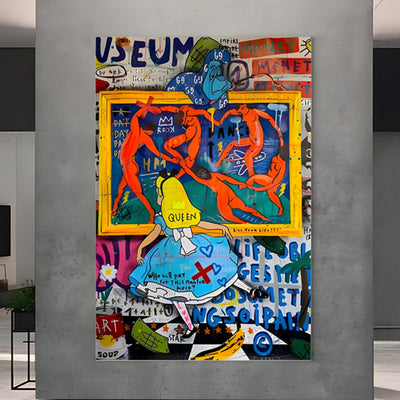
If you find yourself enjoying bold shapes and playful colour more than realism, you might prefer exploring abstract art as a style to practise on canvas. Before you paint, do a tiny thumbnail sketch on paper. Keep it rough stick figures and blobs are fine. You’re deciding where the big shapes go and where the lightest/light and darkest/dark areas will sit. This two-minute step saves you from repainting half the canvas later.
If you’re unsure what to paint, pick something with clear lighting (a lamp by a window is perfect). Light direction makes everything easier especially shadows, highlights, and depth.

Step 3: Create A Fast Underpainting (Your Secret Weapon)
An underpainting is a quick base layer that sets the mood and values (lights and darks). Many beginners skip this, then wonder why the finished piece looks flat. In acrylic arts, underpainting gives you a roadmap and makes later colour look richer.
Here’s a simple method:
Mix a neutral colour (burnt umber + a touch of ultramarine, or any muted brown-grey).
Thin it slightly with water so it moves easily, like ink.
Block in your main shadow shapes and a soft background tone.
Keep it loose. You’re not painting details you’re establishing structure. If you can already “read” the subject in this stage, you’re set up for success.
A useful trick: leave a few lighter areas almost untouched where your brightest highlights will go. It helps later highlights feel clean rather than chalky.

Step 4: Block In The Big Shapes (Paint Like You Mean It)
Now you’ll place the main colours and shapes. This is where many beginners trip up by trying to paint eyelashes before the face exists. Strong acrylic arts paintings are built from clear big shapes first.
How to block in:
Use a medium flat or filbert brush for control without fussiness.
Paint the background first, then the subject. Background-first stops you “painting around” things and getting jittery edges.
Mix enough paint for each area so you’re not constantly remixing mid-stroke.
Keep edges simple. At this stage, accuracy matters less than clarity.
Expect the first coat to look imperfect. Acrylic often needs two thin coats for smooth, even colour. If you try to force coverage in one thick layer, it can dry unevenly and look heavy.

Step 5: Build Depth With Layering (The “Dry First, Then Improve” Method)
Layering is where acrylic arts really shines. Because acrylic dries quickly, you can refine without smearing what’s underneath. The trick is to let each layer do one job rather than trying to do everything at once.
Use this simple order:
Midtones: the “average” colour of an area
Shadows: deeper, often slightly cooler or more muted
Highlights: lighter, often warmer, placed with intention
Work in thin layers rather than one thick fix. Each pass should make the painting clearer: better shapes, cleaner edges, stronger light.
Common mistake: Adding white to lighten everything. White can dull colour fast. Instead, lighten gradually and keep some richer colour underneath so the painting doesn’t look chalky.
If a section goes wrong, don’t panic. Let it dry, repaint the shape cleanly, then layer again. That ability to reset is one of the best parts of acrylic arts.

Step 6: Get Clean Colour Mixing (Without Muddy Colours)
“Mud” usually happens when too many pigments mix together, or when your brush carries leftover colour into a fresh mix. Cleaner mixing makes your painting look brighter and more confident, even with simple subjects.
For cleaner acrylic arts colour:
Mix using two colours at a time, then adjust gradually.
Wipe your brush before moving to a new colour family (especially from dark to light).
Keep a “mixing corner” on your palette so colours don’t get contaminated.
Make a quick test swipe on scrap paper before committing.
A simple mixing set-up:
A warm red, cool red
A warm yellow, cool yellow
A warm blue, cool blue
White (and optional black, used sparingly)
This isn’t about being fancy. It’s about making your mixes predictable, which makes the whole painting process calmer.

Step 7: Blend Without Fighting The Fast Drying Time
Blending is possible in acrylic arts, but it works best when you stop trying to blend like oil paint. With acrylic, you either blend quickly while it’s workable, or you blend in stages using thin layers.
Quick blending method:
Work in small sections.
Lay down the two colours you want to blend, side by side.
Use a clean, slightly damp brush to soften the join with gentle strokes.
Feather the edges lightly rather than pressing hard, so the paint doesn’t lift.
Reload small amounts of paint when needed to keep the surface workable.
Stop before it gets sticky. If it starts dragging, it’s drying don’t keep scrubbing.
Then refine: Once dry, apply a thin glaze over the transition (slightly thinned paint) to smooth it. Glazing is a controlled way to blend that doesn’t rely on racing the clock.

Step 8: Add Texture (Only Where It Helps)
Texture can make a canvas painting feel lively, but if everything is textured, nothing stands out. In acrylic arts, texture is most effective when it supports the focal point.
Use texture intentionally:
Thicker paint on highlights can make them pop.
A palette knife can create crisp, confident strokes.
Dry brushing can suggest rough surfaces quickly.
Building texture in layers helps avoid heavy, overworked areas.
Using texture to follow the direction of form can enhance movement and depth.
Keep smoother areas around textured sections so the texture has contrast. If you enjoy combining texture with collage or extra materials, you might also like mixed media art as a natural next step.

Step 9: Make Your Edges And Details Look Intentional
Details matter, but only after the foundation is solid. Once your layers are in place, focus on edges edges are what make acrylic arts look clean, intentional, and truly “finished.”
Try this:
Sharpen edges where you want focus (often around the subject and key highlights).
Keep edges softer in the background to create depth.
Use fewer details in the distance and more clarity in the foreground.
Then add small highlights last. Highlights are like punctuation: a few well-placed ones say more than dozens scattered everywhere.
A helpful habit: step back a couple of metres. If it reads well from a distance, your shapes and values are working.

Step 10: Finish And Protect The Painting (So It Looks “Done”)
A strong finish can turn a decent painting into something that feels complete. Give your painting a proper ending don’t rush the last step.
Before sealing:
Let the painting dry fully. Acrylic feels dry quickly, but thicker areas need longer.
Remove dust with a soft cloth.
Varnish basics:
Gloss makes colours look deeper and more saturated.
Matte reduces shine and gives a softer look.
Satin is a balanced middle option.
Apply thin, even coats. Don’t overbrush smooth passes look cleaner, and repeated brushing can create cloudy patches.

Quick Troubleshooting (Save This For Later)
Paint looks streaky:
Use gesso, apply two thin coats, and switch to a larger brush for backgrounds.
Colours look dull:
Avoid overmixing, keep your darks strong, and add cleaner highlights.
Painting looks flat:
Increase contrast, sharpen a few key edges, and use glazing for depth.
It looks messy:
Simplify. Re-establish big shapes first, then rebuild details on top.
These quick fixes are part of getting comfortable with acrylic arts every painter hits them.

Conclusion: A Reliable Method For Acrylic Arts On Canvas
A strong painting doesn’t come from rushing or piling on more detail; it comes from doing the basics in the right order. Prep your canvas so paint sits smoothly, plan a simple composition, and start with an underpainting to set your values. Block in big shapes, then build depth through layering, keeping your colour mixing clean and your blends controlled. Add texture only where it supports the focal point, refine edges so the subject reads clearly, and finish with a careful seal so the work looks complete and stays protected. With practice, acrylic arts on canvas becomes less frustrating and far more satisfying.