


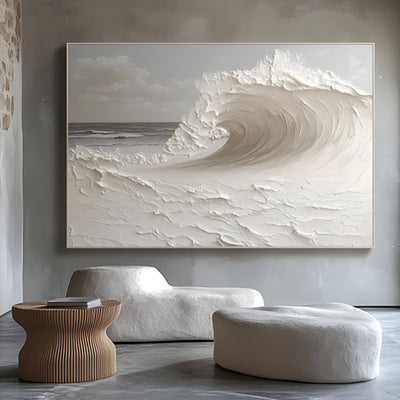


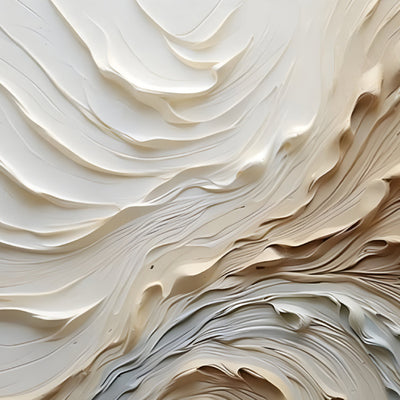


Texture is the ingredient that makes abstract work feel believable, and in organic art it plays an even more important role. Flat colour can look neat, but nature is rarely tidy: stone pits, bark ridges, dried clay cracks, and tide-washed timber all carry marks made by pressure and time. When you build texture with intention, your painting stops looking “painted” and starts looking formed.
This guide focuses on techniques that suit this approach: surfaces that feel weathered, layered, rubbed back, and rebuilt. The aim is not to cover every inch with effects. Instead, you’ll learn how to create a few convincing passages, then let calmer areas hold the composition.

Key Qualities of Natural Texture in Organic Art
Natural-looking texture in organic art comes down to variation and restraint: you’re aiming for surfaces that feel weathered, built up, and gently uneven rather than perfectly patterned. The easiest way to achieve that is to notice how real textures cluster, fade, and change depth instead of staying consistent across the whole surface.
The most convincing texture in organic art usually has three traits:
Irregularity: edges wobble and patterns never repeat perfectly.
Depth shifts: some areas stay smooth while others catch light.
Soft fade-outs: detail gathers, then thins out.
A helpful rule is to choose one “surface story” (wind-worn sand, mineral crust, eroded plaster, layered sediment) and let that story guide your decisions.
Two simple checks that keep your texture believable:
Leave breathing space: keep at least one calmer area so the textured sections feel intentional and natural.
Build in layers, not one hit: add texture in small passes, then pause nature looks accumulated, not instantly applied.

1. Dry Brushing Technique for Organic Grain Texture
Dry brushing creates broken, airy streaks that mimic sun-worn wood grain or dusty stone, making it a reliable technique in organic art. Because the brush is almost dry, the paint catches only on raised areas, which gives the surface a naturally uneven, weathered look that feels shaped rather than painted.
Steps
Load a stiff brush lightly with paint.
Wipe most of it off until the brush feels almost dry.
Drag it gently so it skips across the surface.
Make it look natural
Change direction often, vary pressure, and build two or three light passes. In organic art, the gaps matter as much as the marks.
Two quick tips for better results
Work from light to dark: start with a lighter tone, then add a deeper tone only in a smaller area to create depth without clutter.
Let the texture lead: move the brush with the surface (or your base marks) rather than forcing straight, repeated strokes.

2. Sponge Dabbing Technique for Porous Texture Effects
A torn sponge creates irregular pores and soft speckles that closely resemble stone, weathered surfaces, or lichen growth. Because no two sponge impressions are the same, this technique helps organic art textures feel varied and naturally distributed rather than patterned.
Steps
Tear (don’t cut) the sponge edge so the imprint stays uneven and organic.
Dip lightly into paint, then dab off the excess to avoid heavy blobs.
Tap in clusters, rotating the sponge frequently to prevent repeated patterns.
Change pressure as you work, pressing slightly firmer in some areas and lighter in others to create natural variation.
Build the texture in stages, allowing earlier layers to dry before adding more detail.
Make it look natural
Start with close tones and introduce stronger contrast only in selected areas. Keep the heaviest speckling confined to one zone and allow it to fade outward so the texture feels settled rather than stamped.

3. Palette Knife Technique for Layered Sediment Texture
Knife dragging creates thin strata that resemble eroded plaster, exposed rock layers, or compressed sediment. Because the knife both applies and removes paint, it naturally produces variation that makes the surface feel shaped by time rather than by a single gesture.
Steps
Spread a thin, uneven layer of paint with a palette knife instead of smoothing it flat.
Hold the knife at a low angle so it skims the surface rather than digging in.
Drag the knife in irregular pulls, changing direction to avoid repeated patterns.
Vary pressure as you move, letting some areas remain lightly coated while others are scraped back.
Scrape more firmly in selected spots to expose underlayers and create breaks in the surface.
Pause between passes to assess balance before adding another drag.
Make it look natural
Combine long pulls with short, interrupted drags and resist the urge to tidy edges. In organic art, uneven borders and slight shifts in alignment make layered textures feel settled and authentic rather than controlled.

4. Tissue Lifting Technique for Soft Erosion Effects
Lifting wet paint creates cloudy, worn passages that mimic mist, erosion, or faded mineral staining, a quality that suits organic art especially well. Because you’re removing pigment rather than adding more, the transitions stay soft and naturally irregular, helping the surface feel weathered and formed rather than built up.
Steps
Apply a watery wash, keeping it thin enough to move but not so wet that it pools uncontrollably.
Wait a few seconds for the wash to settle so you lift pigment evenly rather than pulling up puddles.
Press tissue gently onto the wet area where you want lighter, eroded patches.
Lift straight off (don’t drag) to keep edges soft and avoid streaks unless that streaking is intentional.
Repeat with a fresh piece of tissue in different shapes and sizes to prevent a repeated pattern.
Make it look natural
Use fresh tissue each time and vary the placement so the marks feel accidental, not stamped. Once dry, glaze lightly to unify the tones so the lifted area blends into the rest of the organic art surface rather than sitting on top as a separate patch.
If you work in acrylic art, tissue lifting is especially forgiving because you can let each wash dry fast, then repeat the process in light layers without disturbing what’s underneath.

5. Salt Technique for Mineral Bloom Texture
Salt in a wet wash can form halos and blooms that resemble mineral deposits or dried tide residue. As the water evaporates, the salt pulls pigment into soft rings, which creates a naturally uneven, speckled texture.
Steps
Wet an area with a thin wash, keeping it damp rather than dripping.
Wait a moment until the shine dulls slightly so the salt doesn’t dissolve too quickly.
Sprinkle a small amount of salt over the wet area (a little goes a long way).
Leave it to dry completely without touching it, so the blooms form cleanly.
Brush the salt away gently once fully dry, then assess if you want another light pass.
Make it look natural
Place blooms near seams, edges, or “pools” where deposits would realistically collect. If the effect becomes too bold, soften it with a transparent glaze so the texture feels embedded in the organic art surface rather than sitting on top.

6. Grit Additives for Physical Ground Texture
Fine grit adds real physical tooth, which is ideal when you want a surface that feels earthy and grounded rather than smooth. Because the grit creates raised and recessed areas, later layers naturally catch and settle in a way that suits organic art.
Steps
Mix a pinch of clean, fine grit into paint until it looks evenly dispersed (not clumpy).
Apply the mixture with a palette knife or a stiff brush, placing it only where you want stronger texture.
Let it dry completely before glazing over it, so the grit stays locked in place.
Test the surface with a light glaze to see how the pigment catches, then decide if you need a second thin grit layer.
Make it look natural
Vary thickness and feather the edges so the texture fades out instead of ending abruptly. Treat grit as an accent rather than a blanket; too much across the whole canvas can make organic art feel heavy and crowded.

7. Imprinting Technique for Natural Surface Patterns
Imprinting borrows real-world texture so your surface carries a believable, irregular pattern without you having to paint every detail by hand. Because the marks come from an actual textured object, the result often feels more natural and less repeated than a brush-made pattern.
Steps
Brush a thin, even layer of paint onto the canvas, keeping it wet but not puddled.
Press a textured item into the paint (leaf, fabric, crumpled paper), applying uneven pressure so some areas grab more pigment than others.
Lift carefully to reveal the impression, pulling straight up to avoid smearing the pattern.
Repeat in a nearby spot with a slightly different angle or a different object so the texture doesn’t look copied.
Once dry, glaze lightly over parts of the print to soften edges and blend it into the surrounding surface.
Make it look natural
Press unevenly so some areas print crisply while others fade, which prevents the texture from looking stamped. Glaze over sections so the imprint becomes integrated organic art texture rather than a sharp, recognisable pattern sitting on top.

8. Wax Resist Technique for Broken Edge Effects
Wax resist creates broken edges because paint can’t cling to waxed areas, which produces natural-looking gaps and soft “waterline” breaks. It’s especially useful in organic art when you want edges to feel worn, tide-marked, or gently interrupted rather than clean and outlined.
Steps
Rub a candle or wax crayon lightly on a dry surface, focusing on the edges or paths where you want paint to resist.
Keep the wax marks irregular and incomplete so the resist doesn’t form a neat, recognisable pattern.
Paint a thin wash over the wax, letting the liquid move naturally across the surface.
Tilt the canvas slightly (if needed) so the wash settles into the gaps around the wax and creates softer transitions.
Let the layer dry fully, then repeat with another light wash if you want more depth.
Make it look natural
Keep lines wandering and unfinished, and build the effect through several thin layers rather than one heavy pass. In organic art, wax resist looks most believable when it suggests a natural process and leaves plenty of quiet space around it.

9. Glazing Technique for Depth and Cohesion
Glazing is what makes all your separate textures feel like they belong on the same surface, rather than looking like isolated effects. By adding thin, transparent layers, you can deepen colour, soften harsh contrasts, and create the sense that the surface has built up over time.
Steps
Let every textured layer dry completely so the glaze sits on top instead of muddying the paint underneath.
Thin paint with medium or water until it becomes transparent, aiming for a tinted film rather than a solid coat.
Brush the glaze on lightly, working in smooth passes so you don’t disturb raised texture.
Wipe back gently with a soft cloth or tissue to preserve highlights and let pigment settle into the dents.
Allow it to dry, then repeat with a second (or third) glaze if you want more depth and cohesion.
Make it look natural
Use related tones and build the effect in two or three rounds rather than trying to fix everything in one layer. Glazing is where organic art starts to look like a surface with history, because colour collects in recesses and slowly unifies the whole composition.

Common Texture Mistakes and How to Correct Them
Most texture problems come from three habits: doing too much, repeating a pattern, or forgetting the quiet parts. If your surface looks busy, simplify by glazing a neutral layer over the loudest area, then wiping it back so pigment settles in the dents. That turns visual noise into atmosphere.
If a sponge or imprint starts to repeat, rotate the tool, change pressure, and interrupt the sequence with a few handmade marks (a scrape, a dry-brush pass, or a wash). Lastly, avoid outlining every textured shape. Leaving edges partially lost is what makes surfaces feel weathered rather than designed.
If the surface still feels too “even,” reduce texture in a few places rather than adding more elsewhere. This gives the eye somewhere to rest and makes your strongest texture feel more deliberate. Keep your most detailed area in one zone, then let it fade outward so the effect feels natural. A little restraint goes a long way when you want the whole piece to feel formed.

How to Combine Texture Techniques Without Overcrowding
To keep organic art readable, it helps to organise texture with clear hierarchy. When every area carries the same level of detail, the eye has nowhere to rest and the surface can feel crowded rather than intentional.
By separating texture into a main focal area, supporting passages, and quieter zones, you give the composition structure. This balance allows textured sections to stand out while calmer areas create contrast, making the overall surface feel considered, natural, and easier to read.
Hero texture: your main tactile area.
Support texture: quieter texture that links zones.
Rest area: calmer space so the eye can breathe.
As you build, step back often. If everything feels equally textured, nothing feels special. One strong passage, one softer echo, and one quiet stretch usually looks more intentional than nine techniques everywhere at once.
If your foundation is abstract art, this is the point where texture becomes part of composition rather than decoration: it should guide movement, balance visual weight, and support the shapes you’ve chosen.

Conclusion: A Nature-Led Texture Plan for Organic Art
Natural-looking texture comes from variation, restraint, and layering. Dry brushing suggests wind-worn grain, sponge dabbing creates pores, palette knife dragging builds sediment-like layers, and tissue lifting softens transitions. Salt adds mineral blooms, grit creates physical tooth, imprinting introduces natural pattern, wax resist forms broken edges, and glazing ties everything together.
If you’ve explored leather art, you already understand how surface and grain change the way light behaves; the same idea applies here. Choose one surface story, cluster your detail, leave calm areas, and stop before the surface becomes crowded. That is how organic art starts to look like nature made it.